Core Assembly
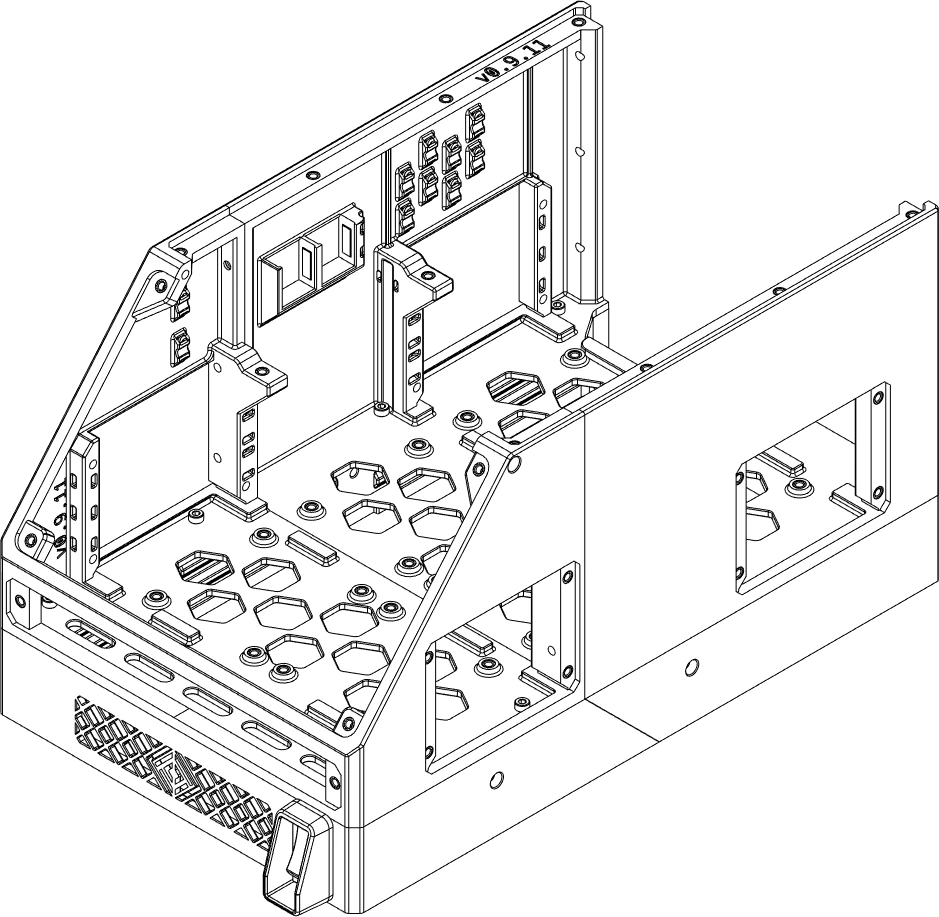
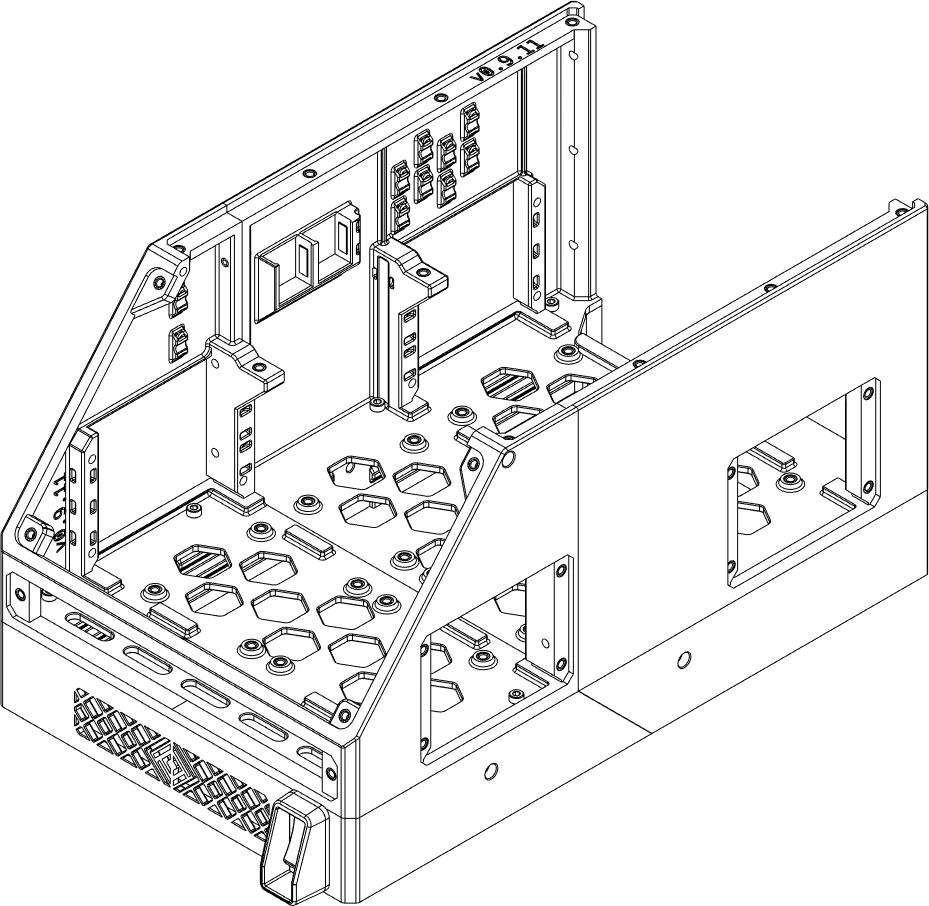
Next we'll add the front and rear halves of the Main Body to the Base.
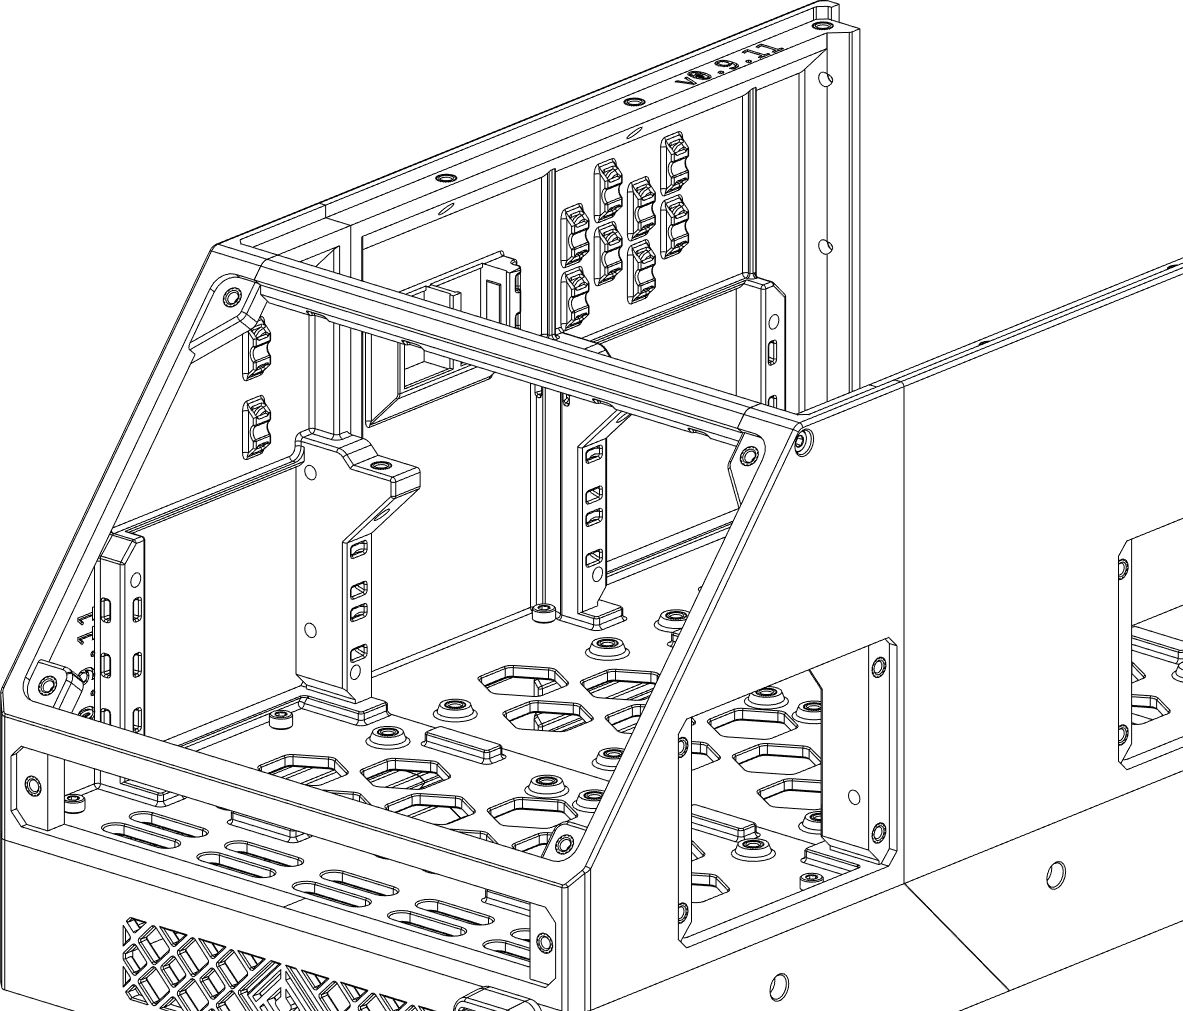
Attach the Main Body
Overview
Materials
| Parts | Qty | Note |
|---|---|---|
| M3 x 6mm SHCS | 8 | |
Main Body - Front - HSI.stl |
1 | |
Main Body - Rear - HSI.stl |
1 |
| Parts | Qty | Note |
|---|---|---|
| #6 x 3/4" sharp point screws | 8 | |
Main Body - Front - Stock.stl |
1 | |
Main Body - Rear - Stock.stl |
1 |
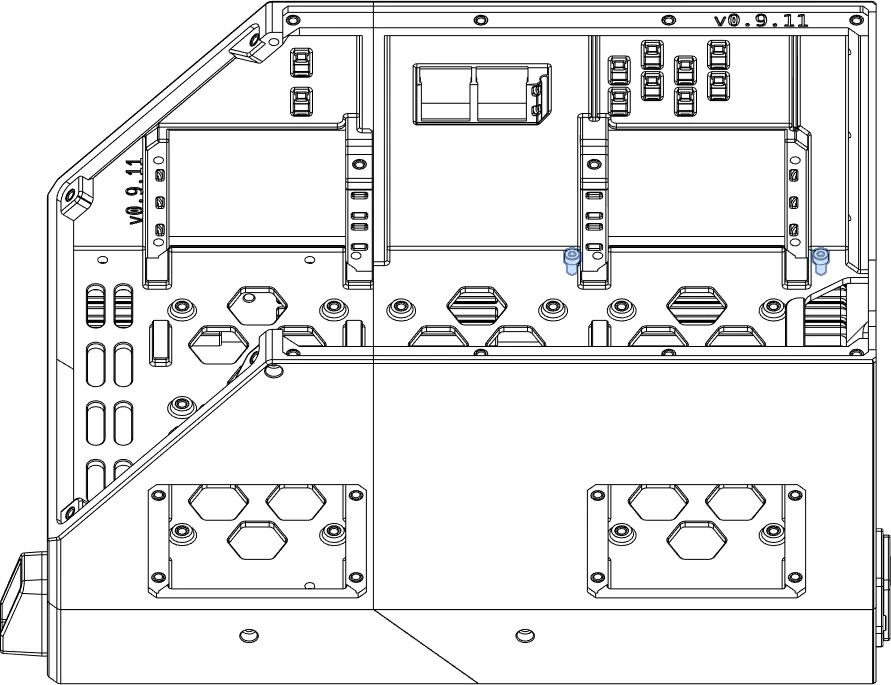
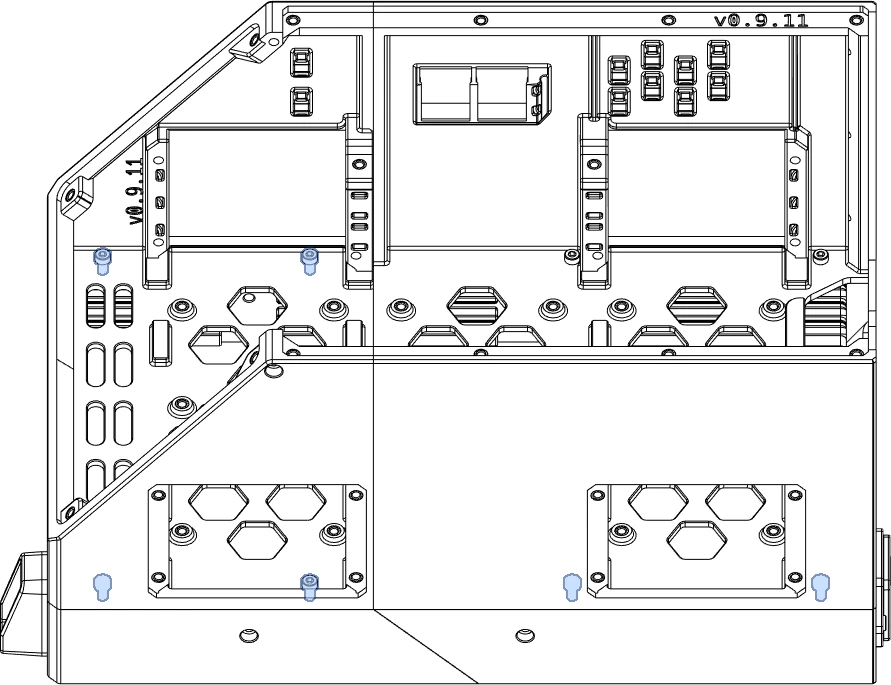
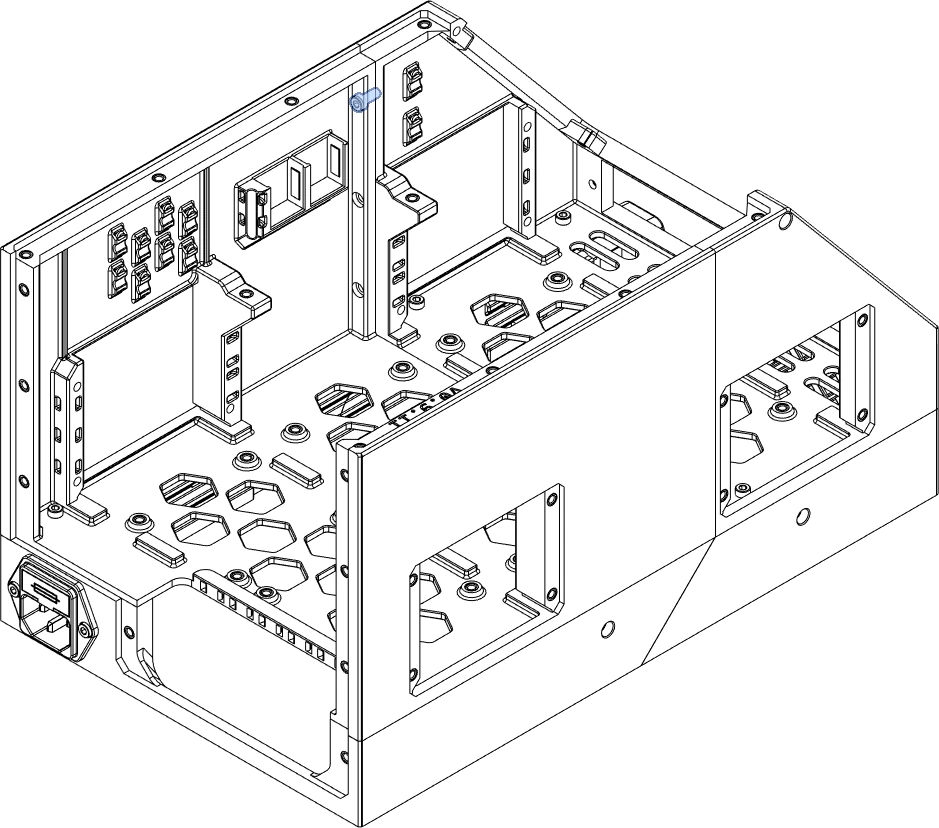
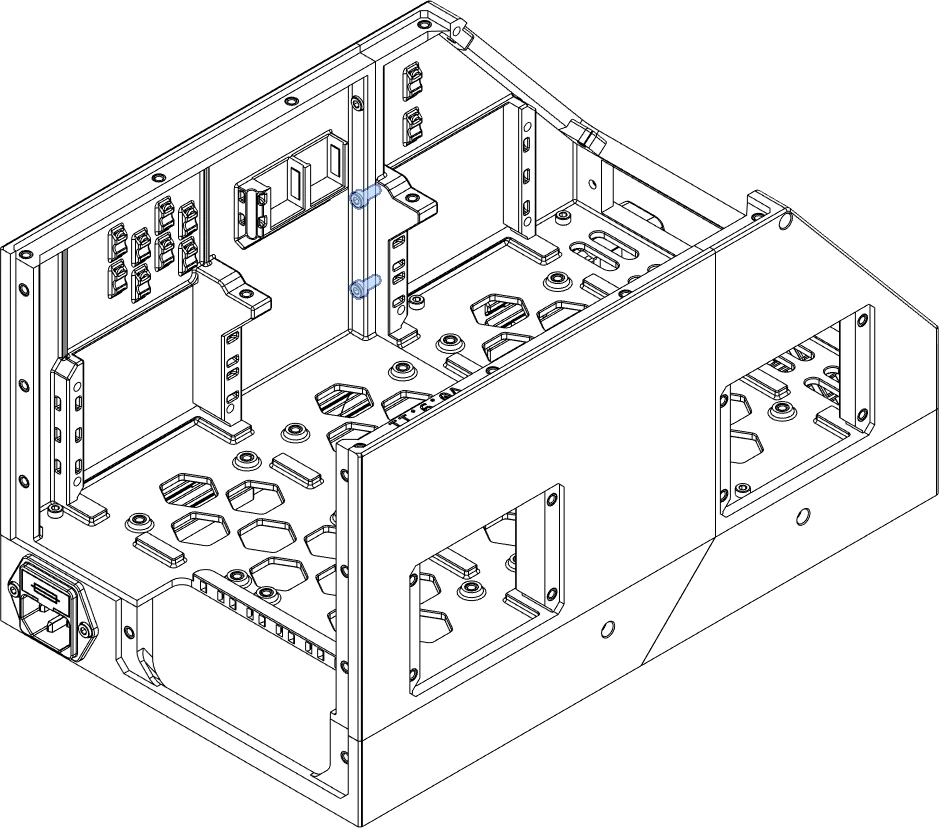
Directions
Note: Alignment
If inserting a screw becomes difficult, back out and check:
- That both halves of the main body are still correctly aligned; and
- That the already-inserted screws are straight.
If using heat set inserts, double-check that the inserts in the Base are straight, as well.
Note: the support ghosts in the illustration are caused by a software bug; supports should be removed.
HSI: tighten to finger tightness.
Stock: tighten about halfway.

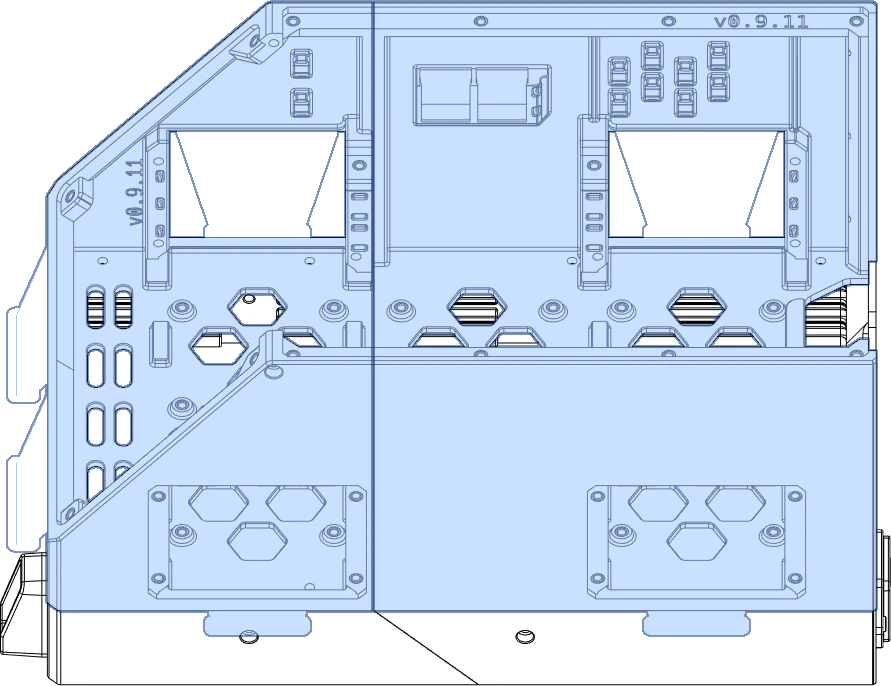
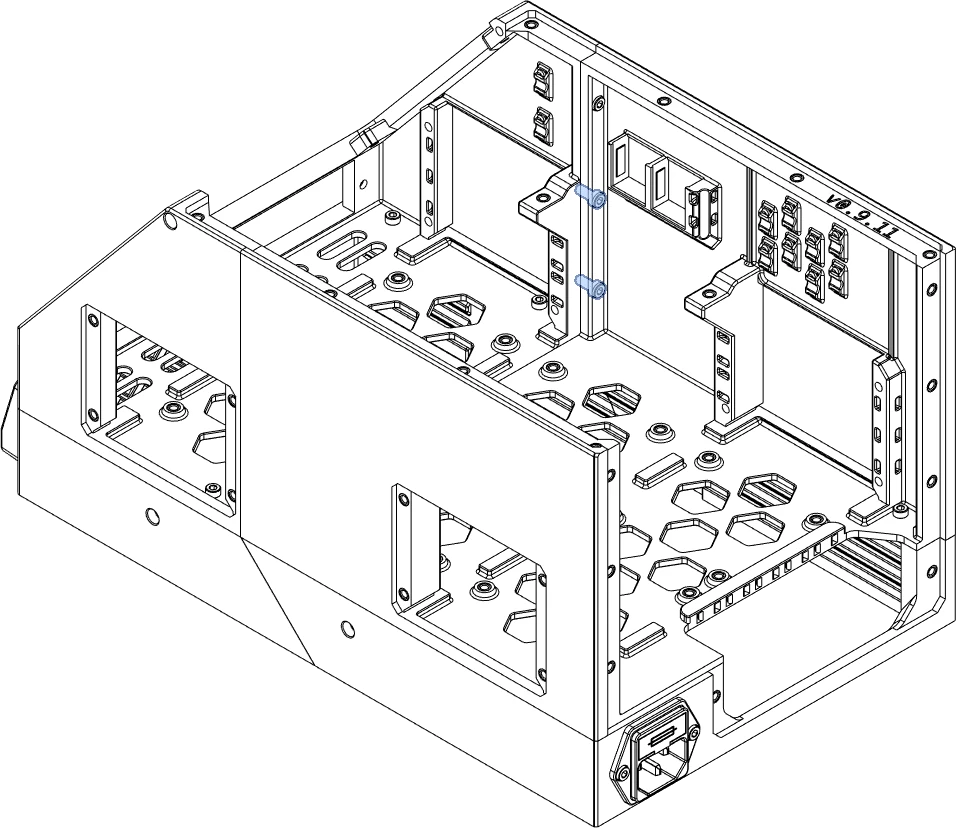
Reference
Join the Main Body
Unified Builds
Skip to Attach the Crossbar if you have printed a Unified Main Body.
Overview
Materials
| Parts | Qty | Note |
|---|---|---|
| M3 x 8mm SHCS | 6 |
Directions

Reference
Attach the Crossbar
Overview
Materials
| Parts | Qty | Note |
|---|---|---|
| M3 x 16mm SHCS | 2 | |
Main Body - Crossbar - HSI.stl |
1 |
| Parts | Qty | Note |
|---|---|---|
| M3 x 20mm SHCS | 2 | |
Main Body - Crossbar - Stock.stl |
1 |
Directions
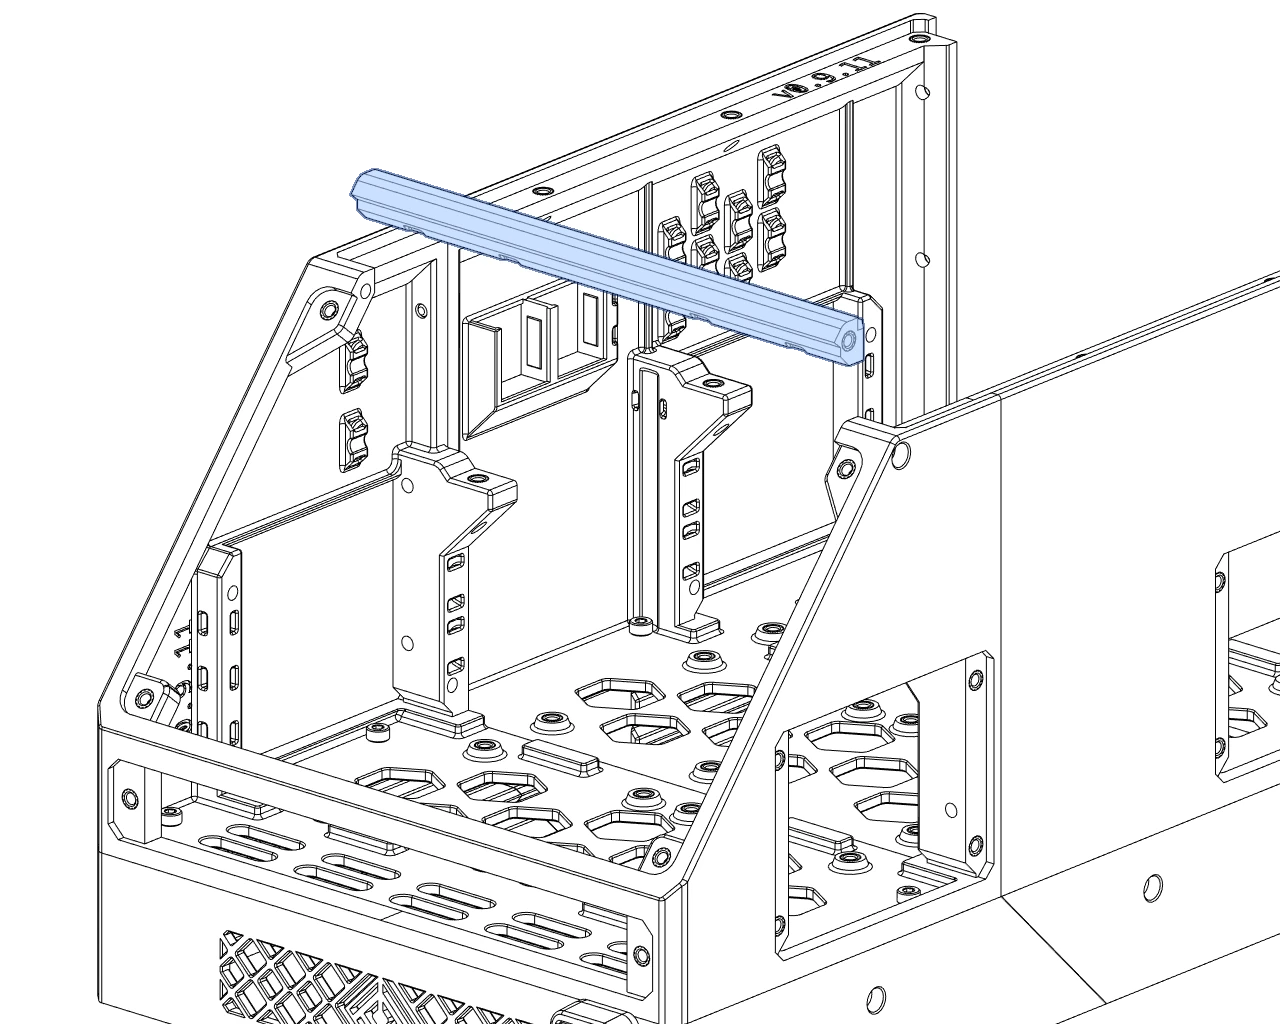
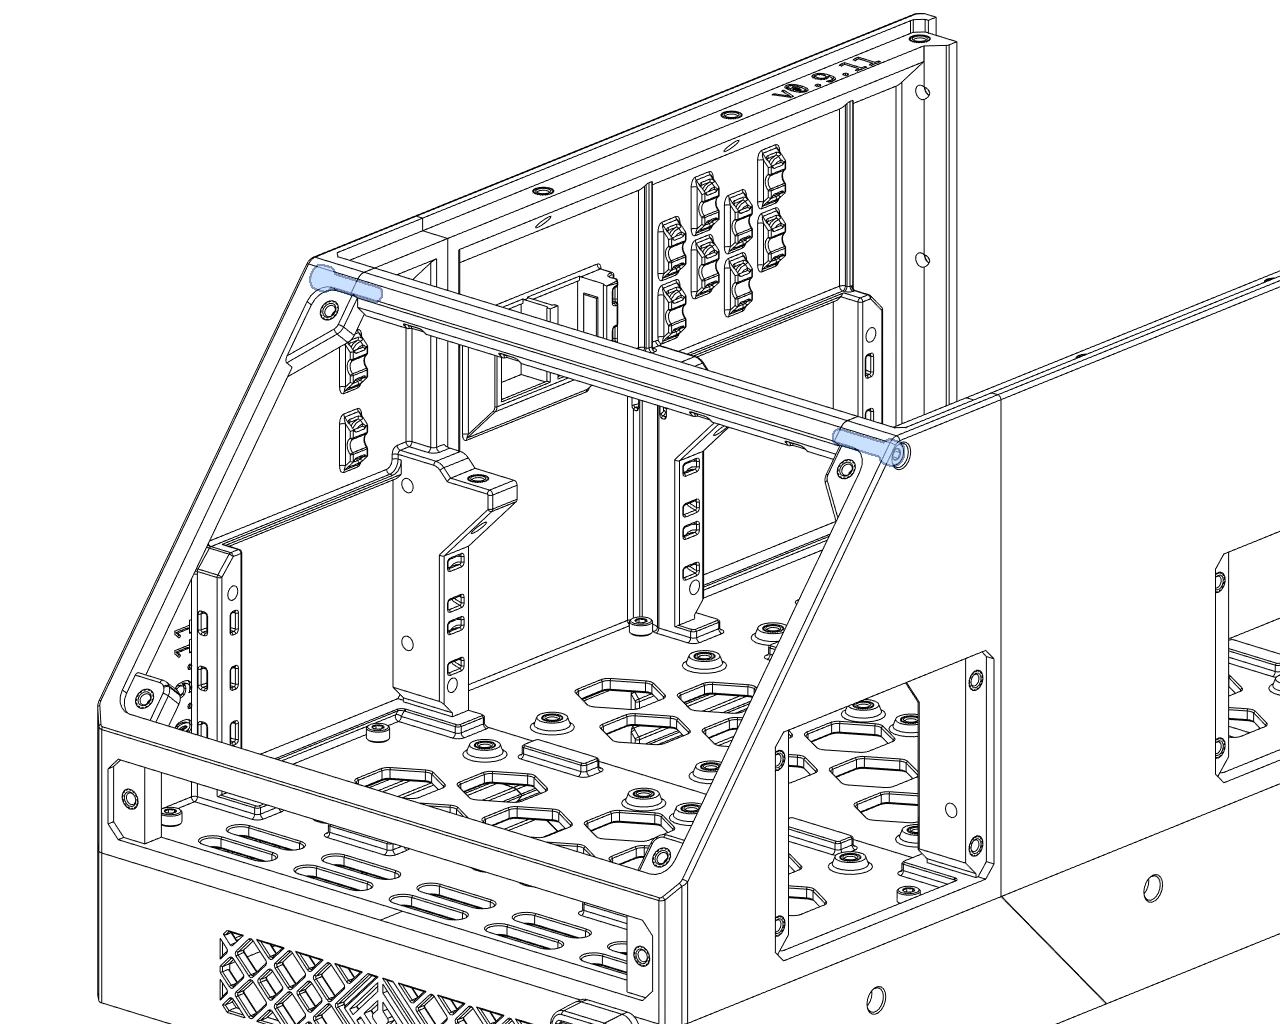
These screws can be adjusted to help square the sides of the case body .
Reference