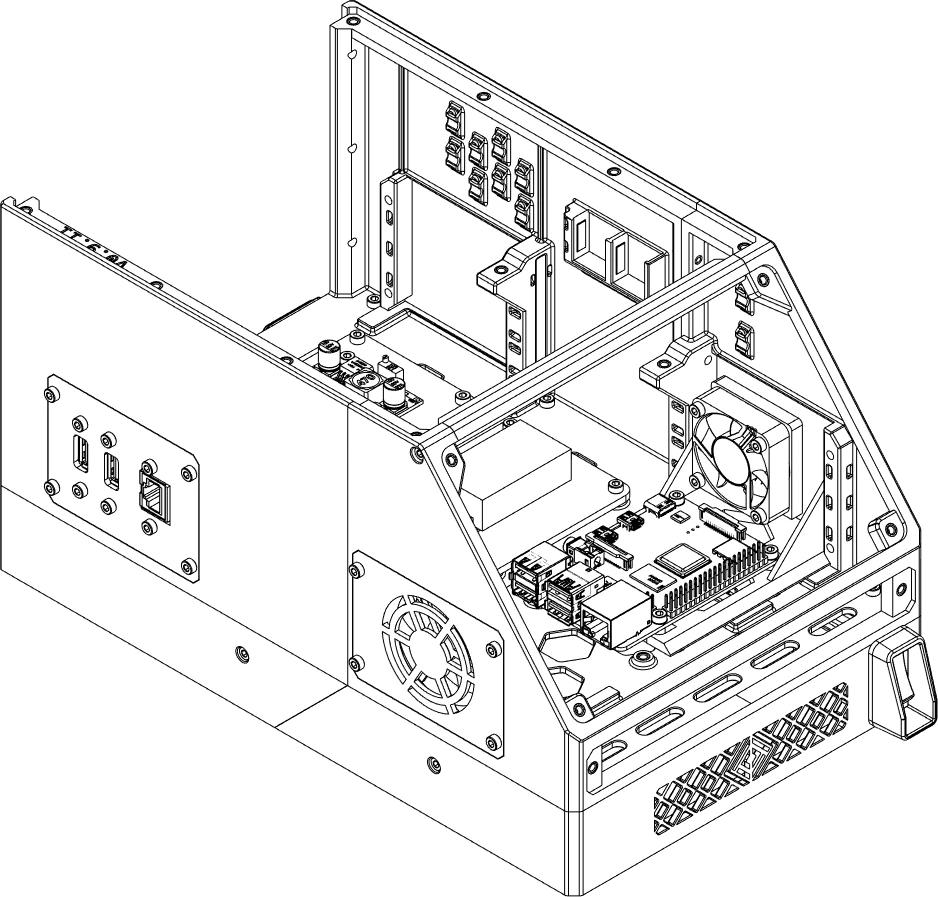
Side Panels
Each case has four (4) locations for a side panel. If you have a CPU tray installed, one side panel is already occupied. In this case, you will instead need three (3) side panels.
You should install all of your side panels before moving on to the next section. We will demonstrate the installation of a single side panel as an example.
Overview
Overview
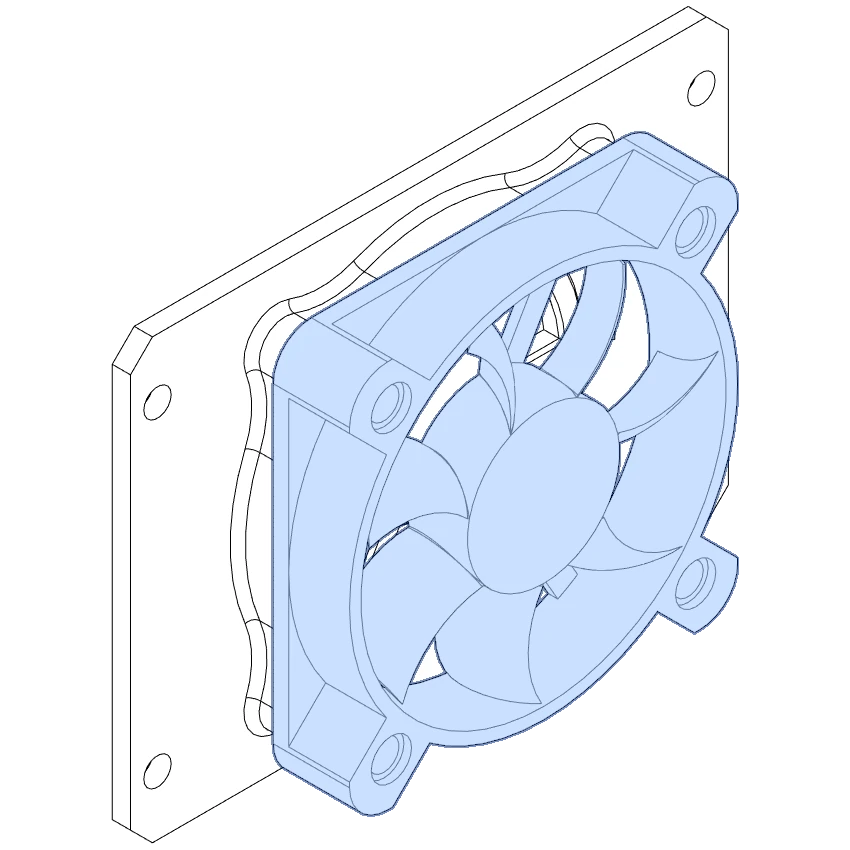
Materials
| Parts | Qty | Note |
|---|---|---|
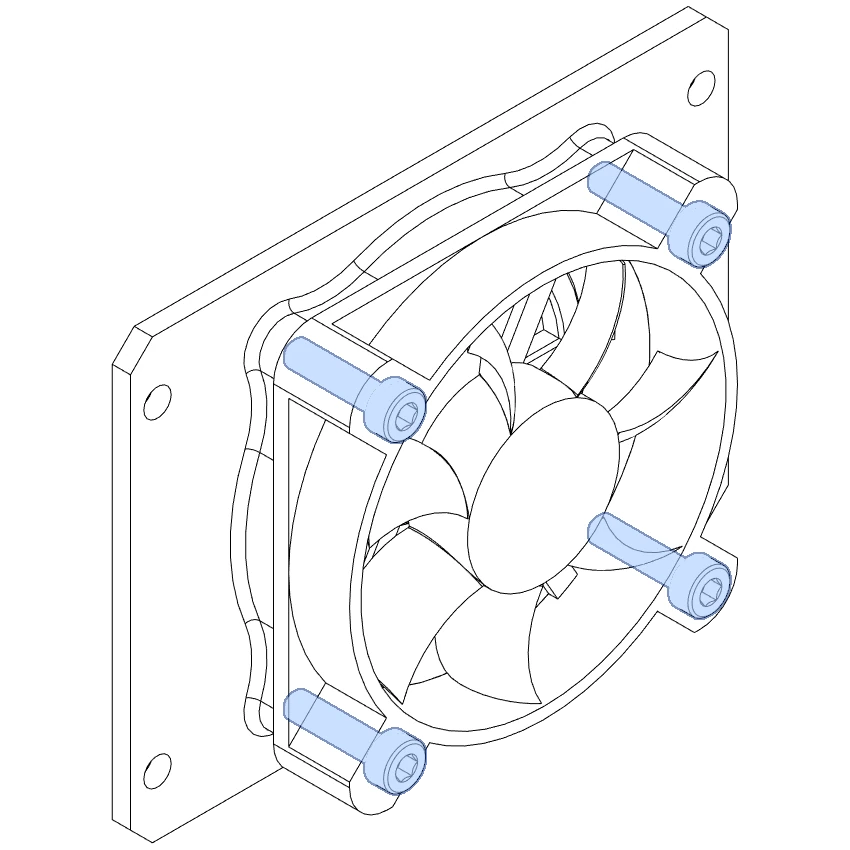
| M3 x 6mm SHCS | 4 | |
| M3 x 16mm SHCS | 4 | |
| 50x12mm Axial Fan | 1 | |
Side Panel - 50mm Fan - Grill - HSI.stl |
1 |
| Parts | Qty | Note |
|---|---|---|
| M3 x 8mm SHCS | 4 | |
| M3 x 16mm SHCS | 4 | |
| 50x12mm Axial Fan | 1 | |
Side Panel - 50mm Fan - Grill - HSI.stl |
1 |
| Parts | Qty | Note |
|---|---|---|
| M3 x 6mm SHCS | 4 | |
Side Panel V2 - Blank.stl |
1 |
| Parts | Qty | Note |
|---|---|---|
| M3 x 8mm SHCS | 4 | |
Side Panel V2 - Blank.stl |
1 |
Directions
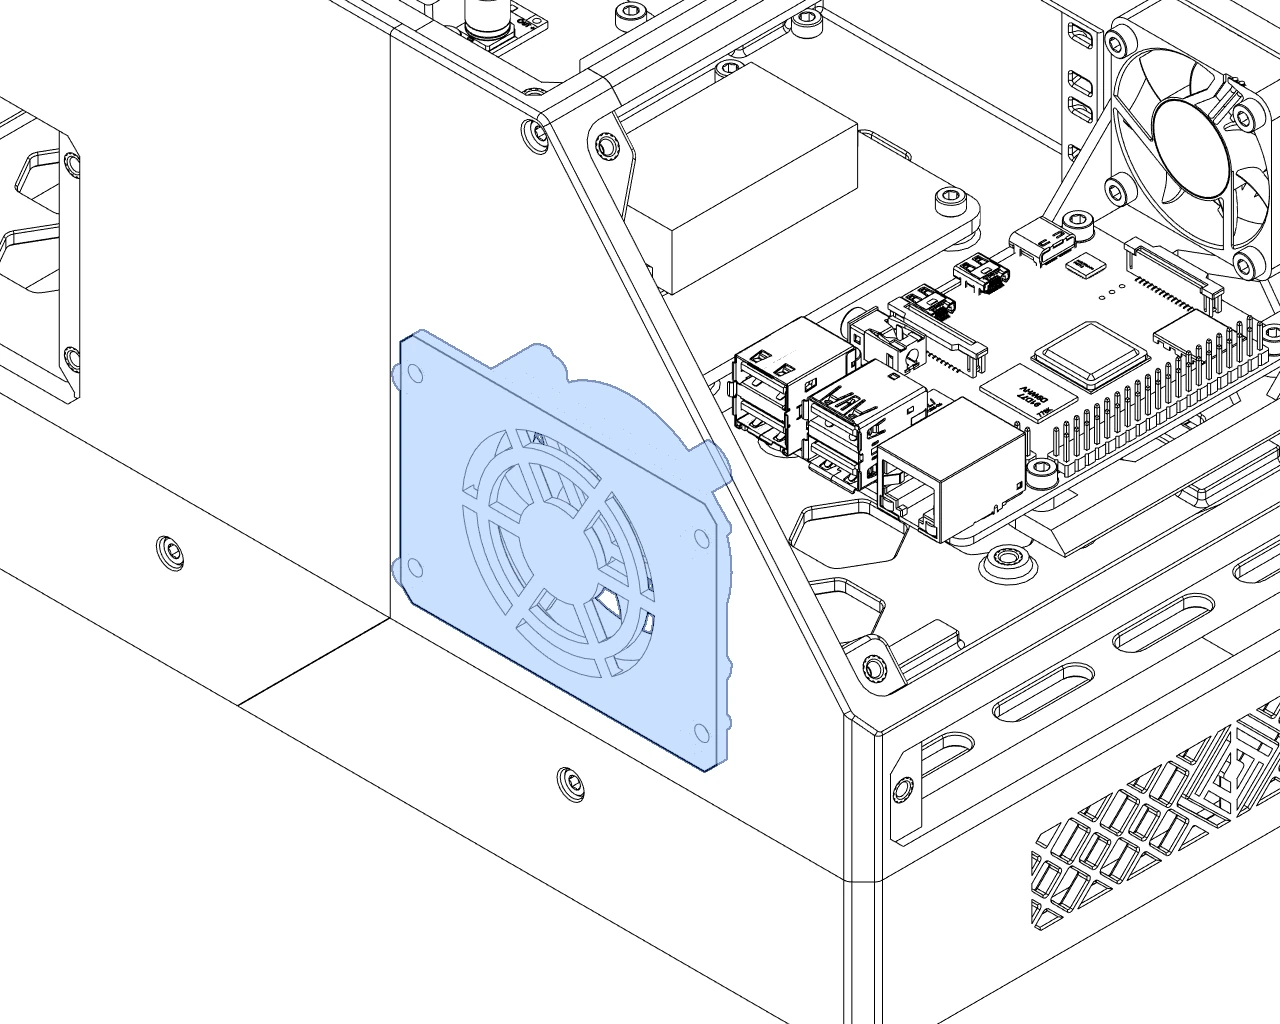
This fan will act as a second intake in the front, opposite the 40mm fan on the Raspberry Pi tray.

HSI: M3 x 6mm
Stock: M3 x 8mm
Reference