CPU
If you are not using a SoC CPU like a Raspberry Pi, use a fourth side panel in that assembly section and skip this page.
Overview
Overview
Materials
| Parts | Qty | Note |
|---|---|---|
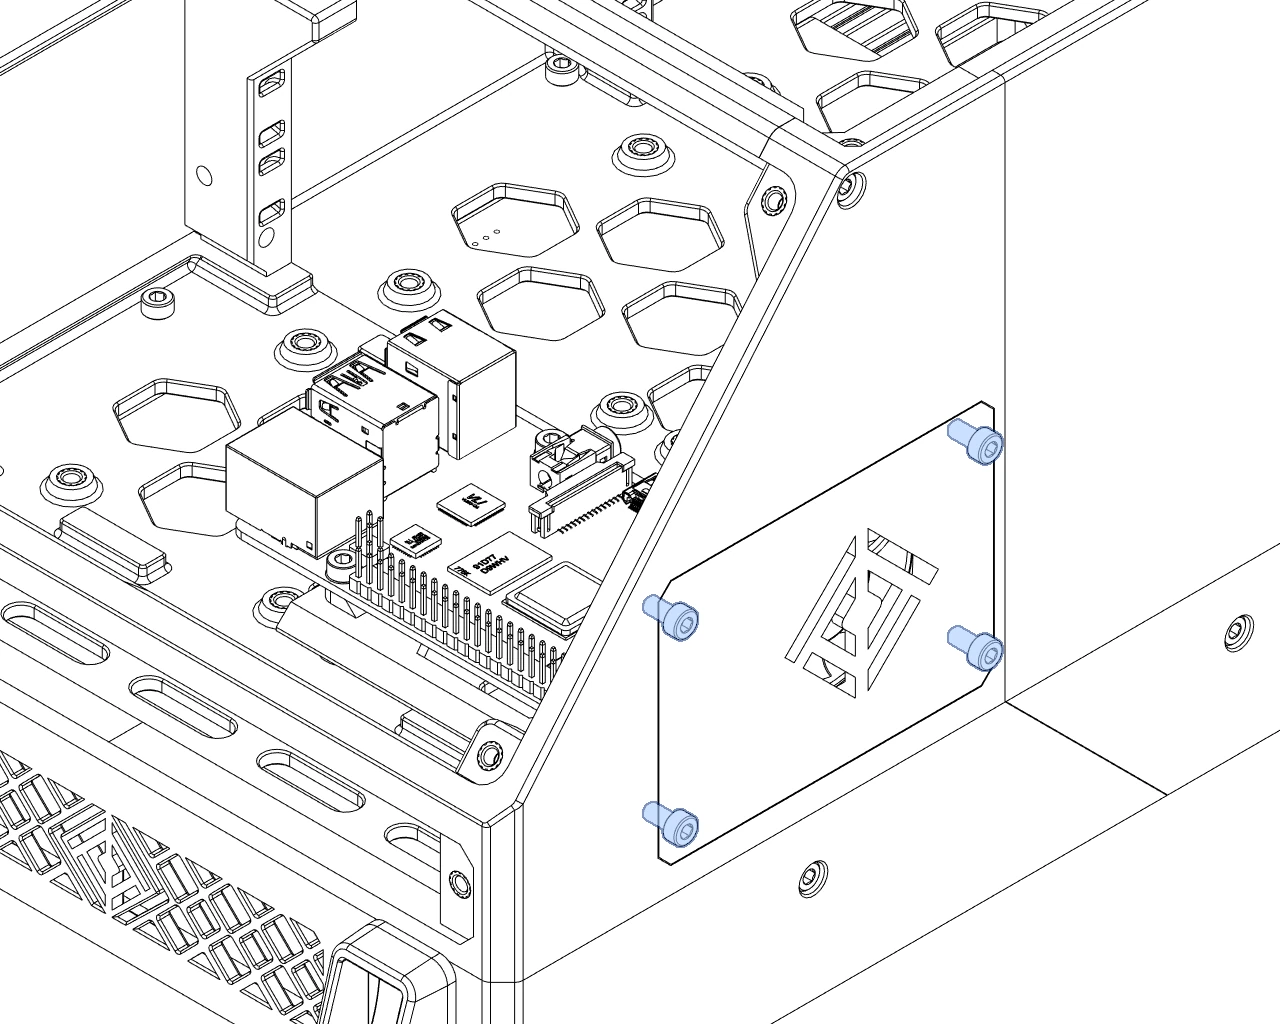
| M3 x 6mm machine screws | 8 | |
| M3 x 15mm machine screws | 4 | May substitute 14mm. |
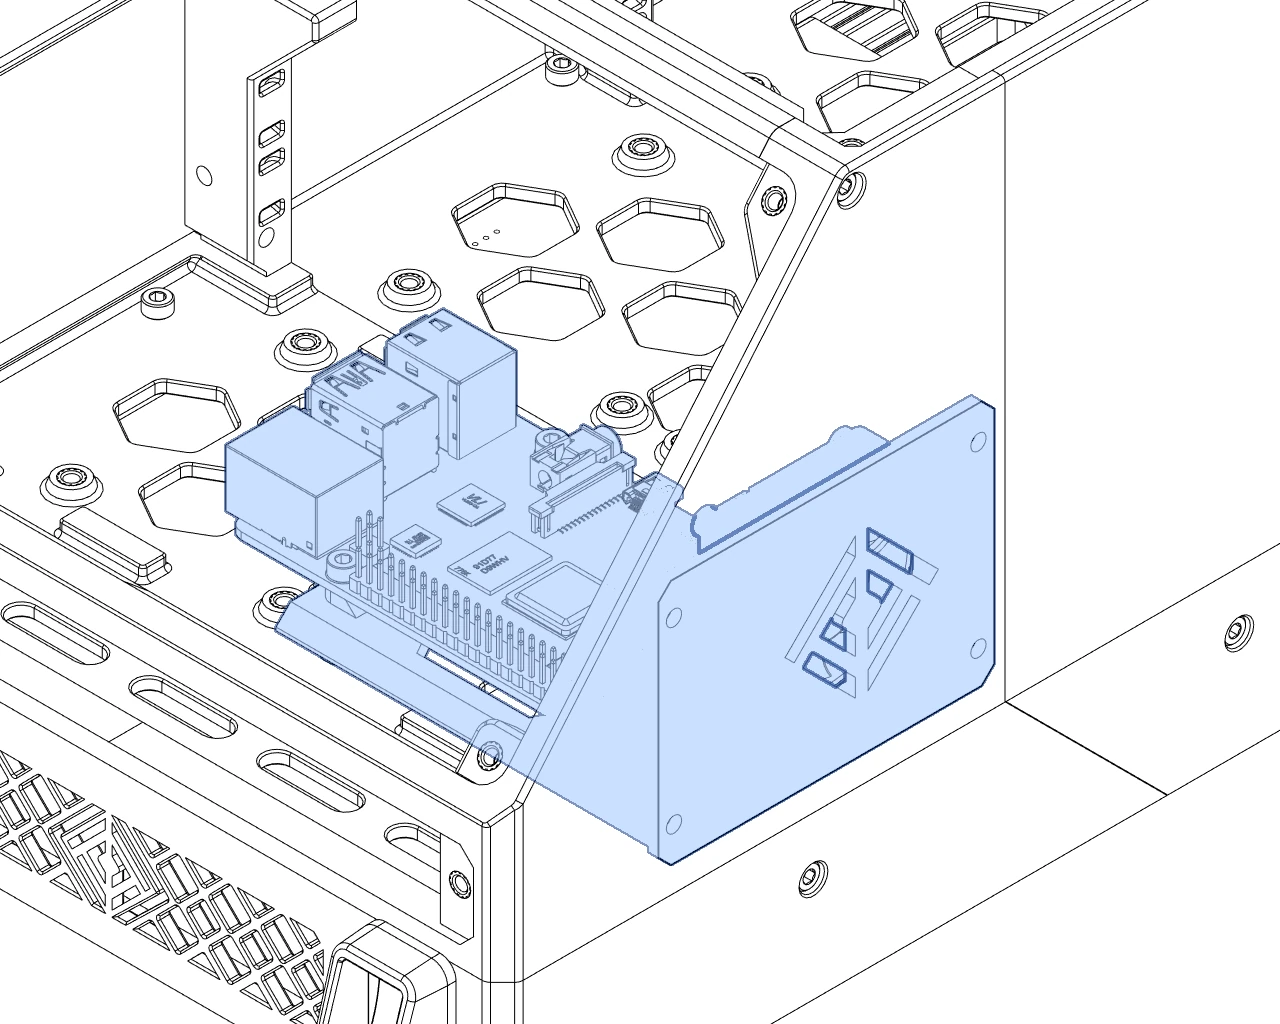
| Raspberry Pi 4B | 1 | |
| 40mm x 10mm Axial Fan | 1 | |
RPi Universal Tray w 40mm Fan - HSI.stl |
1 |
| Parts | Qty | Note |
|---|---|---|
| M3 x 6mm machine screws | 4 | |
| M3 x 8mm machine screws | 4 | |
| M3 x 15mm machine screws | 4 | May substitute 14mm. |
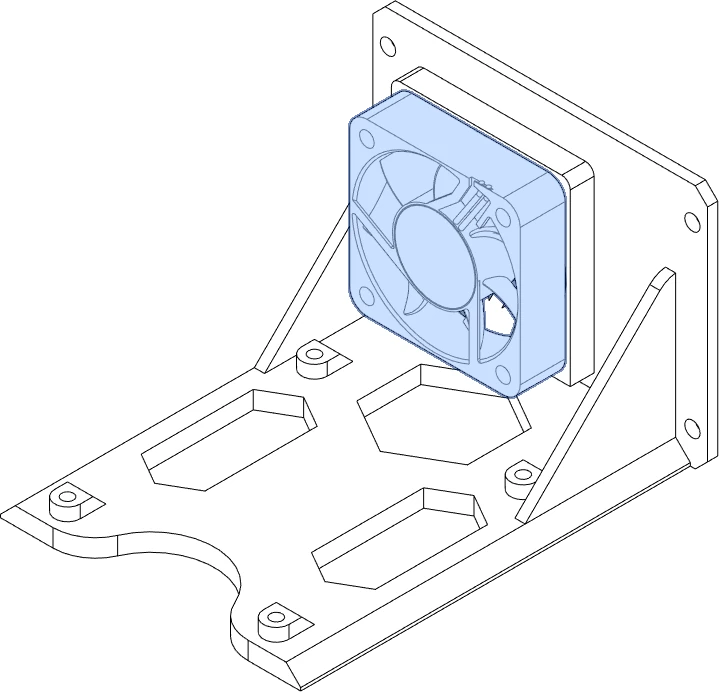
| 40mm x 10mm Axial Fan | 1 | |
| Compatible SoC CPU | 1 | |
RPi Universal Tray with 40mm Fan.stl |
1 |
Warning: M3 x 16mm screws
If you must use M3 x 16mm screws for the 40mm fan, do not overtighten or you may deform the outer panel surface.
Directions
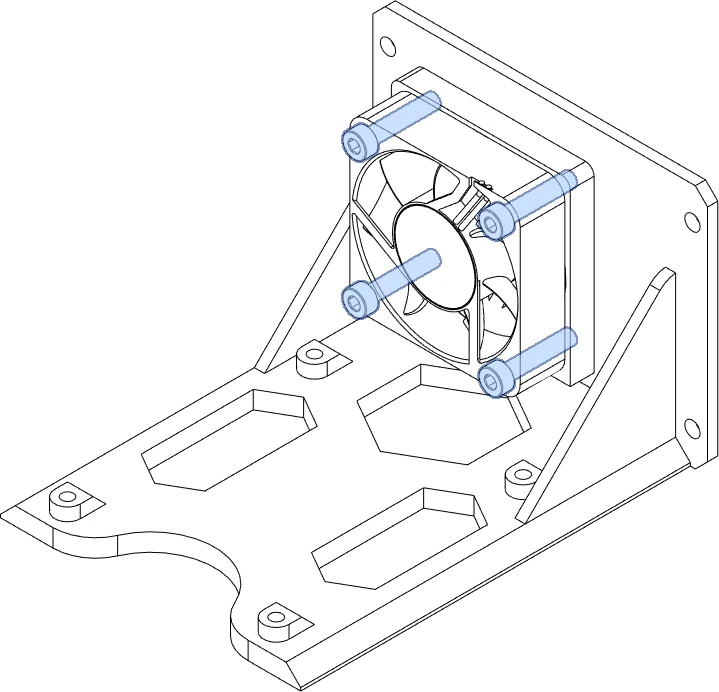


HSI: M3 x 6mm
Stock: M3 x 8mm
Reference
